Getting the Jotunn Star in Totenreich isn't one of those quick side tasks you can knock out between rounds. It's tied into the map's bigger quest flow, so you've got to open things up properly first, get power running, and unlock Pack-a-Punch before the real hunt starts. A lot of players jump in hoping for a simple pickup, then realise this weapon is built through several connected steps. If you've already spent time grinding setup runs or even messing around in a CoD BO7 Bot Lobby, you'll probably notice Totenreich asks for a more methodical approach, because the Wonder Weapon path only starts to make sense once the map systems are fully active.
Opening the route
The first real job is moving through the standard progression on Fishery Island and the nearby areas until power is restored everywhere it needs to be. That part matters more than it seems. Pack-a-Punch access helps with survival, sure, but it also lines up the map so later quest spaces and interactions become available. Once the orange guidance markers drop away, that's usually your sign that the game is done holding your hand. From there, the Jotunn Star quest starts feeling more hidden, and you've got to pay attention to where items are used instead of waiting for the HUD to spell it out.
Collecting the build pieces
The construction sequence starts in Dry Dock with the Chain Links. To get them, you need to activate the crane from the control area, drop the platform, and make a quick movement play toward the front of the ship. Miss the timing and you're doing it again. After picking up the Chain Links, bring them to the Burial Grounds and use them to open the sealed entrance. That leads into the ritual side of the quest. From there, players usually hunt down the next materials, including the Lantern and Chili Chunks. These aren't just random pickups. One tends to come from a tougher encounter, while the other is tied to map searching and interaction points. Once both are placed at the correct table or altar, the next event kicks in.
The puzzle and the escort
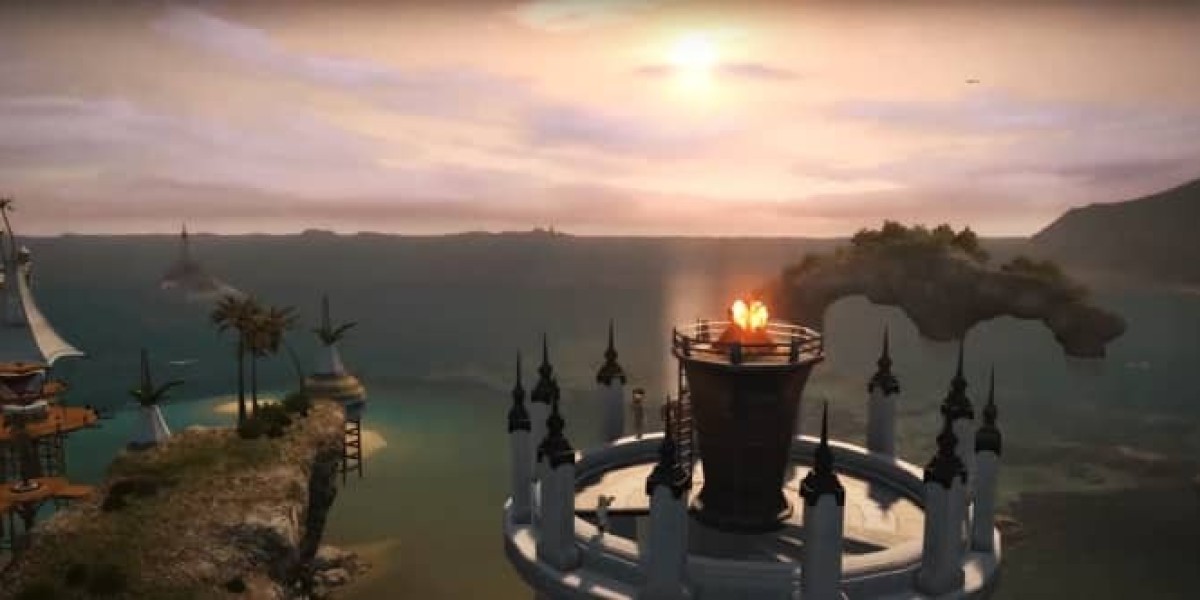
Inside the Burial Grounds chamber, placing the lantern starts the constellation puzzle. This bit can get messy if the round is still active, so most people leave one zombie alive and handle it without pressure. The symbols on the walls have to be matched in the right order, and the pattern can change from game to game. Get it right, and a ghostly figure, usually referred to as Astrid, appears and starts the last major step. You then follow her across several zones toward the Lighthouse. She won't keep moving on her own for long, though. You need kills around her path to push the escort forward, which means the whole team has to stay alert and avoid drifting too far away.
Claiming and upgrading the weapon
Once Astrid reaches the Lighthouse, she creates the platforms needed to climb the outside and reach the top. That's where the Jotunn Star is finally waiting, and after all the setup, it feels earned. The nice part is that the upgrade process is much simpler than the build. You can take it straight to Pack-a-Punch for a stronger version with better damage and more reliable energy attacks. Some players talk about a higher-tier fire-themed form, but the core idea stays the same: the hard part is getting the weapon in the first place. After that, it becomes a practical high-round tool, especially for anyone who wants a smoother run than what they'd get in a standard Multiplayer Bot Lobby session with less pressure and fewer surprises in the middle of the match.